StockWatch
📈 StockWatch


A production-deployed stock monitoring app with live market data, interactive charts, and per-user watchlists. Built with Flask and Plotly Dash, backed by the Massive.com market API and PostgreSQL.
What this project demonstrates
A full-stack web app taken end to end — designed, built, deployed, and running live with a public demo. It shows real third-party API integration, response caching, authentication, schema migrations, and a modular Flask architecture, all wired together and shipped to production.
🔗 Live Demo
| URL | stockwatch-cqzs.onrender.com |
| Demo login | demo@stockwatch.dev / Demo123! |
⏱️ Hosted on Render’s free tier — the first visit after idle may take ~30s to cold-start, then responds normally. The demo account is shared for evaluation and can be reset safely.
🖼️ Screenshots
| Stock dashboard |
|---|
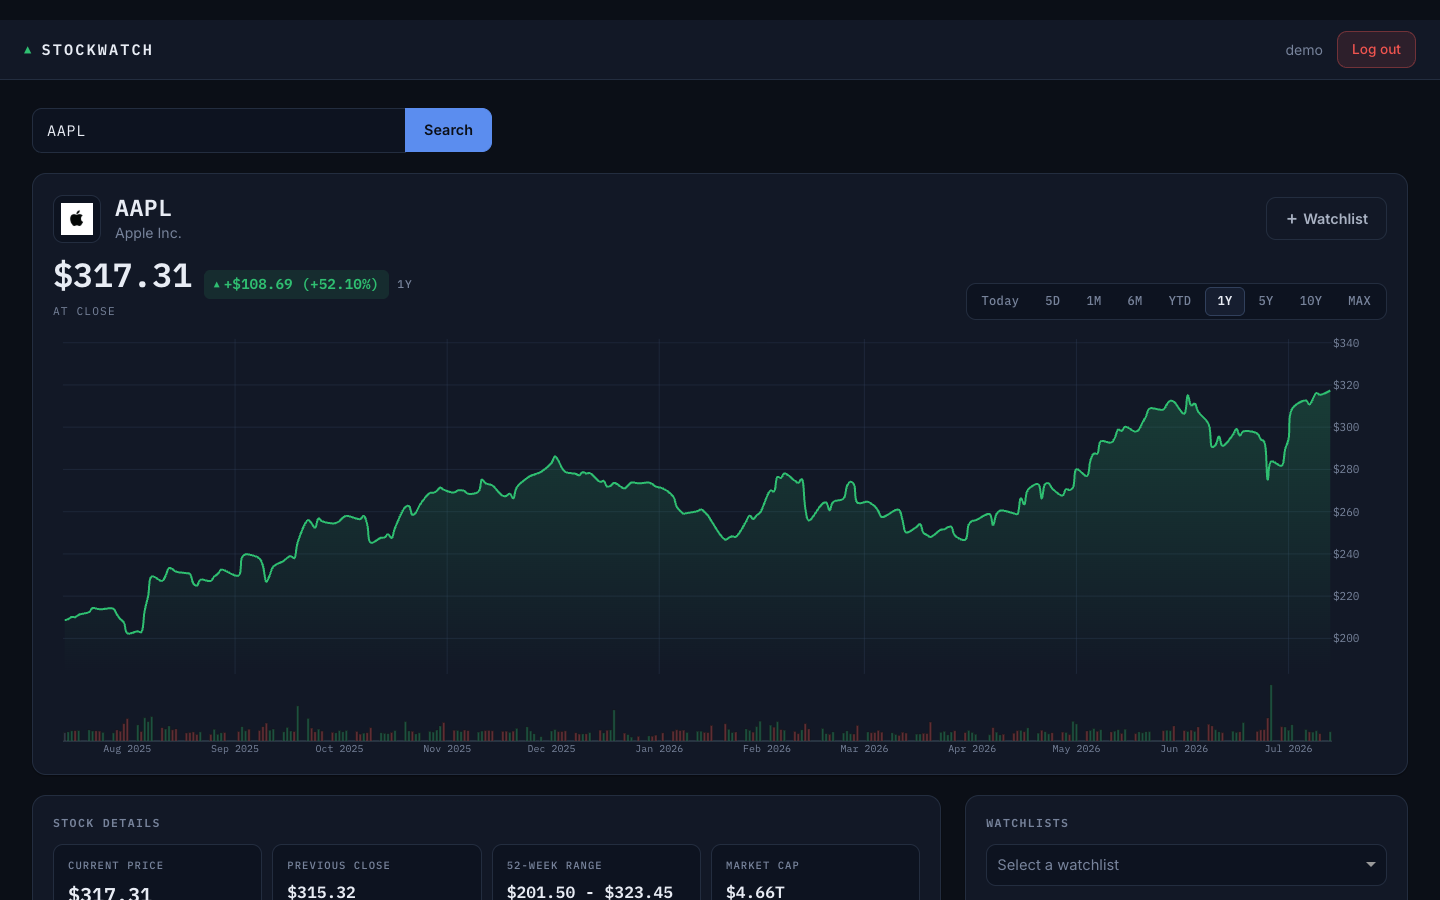 |
| Watchlist management |
|---|
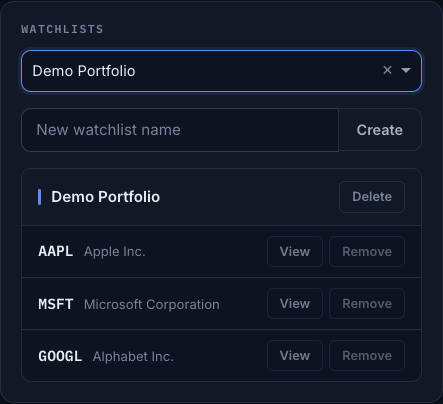 |
⭐ Highlights — why this matters
- Shipped to production, not just localhost — live URL, demo credentials, and a
/healthendpoint for monitoring. - Real API integration under cost constraints — a 5-minute price cache and 24-hour company-details cache cut redundant Massive.com calls and keep the app responsive.
- Production-grade data practices — schema changes are versioned with Alembic migrations rather than hand-edited, with SQLite locally and PostgreSQL in production.
- Modular, testable architecture — a Flask application factory with blueprints keeps routes, services, and models cleanly separated.
- One-click deploys —
render.yamlandapp.yamlblueprints provision the database and web service automatically.
✨ Features
| Feature | Description |
|---|---|
| 🔐 Authentication | Registration and login via Flask-Login with hashed passwords |
| 📊 Live market data | Current prices and company details from the Massive.com REST API |
| 📈 Watchlist management | Create and delete multiple watchlists; add or remove tickers |
| 📉 Interactive charts | Line charts with volume overlays — Today shows intraday session bars; 5D–MAX use daily history |
| 🏢 Company fundamentals | Logo, market cap, exchange, website, description, and day-over-day price change |
| ⚡ Response caching | 5-minute price cache and 24-hour company-details cache |
| 🗄️ Database migrations | Schema versioning with Flask-Migrate / Alembic |
🧰 Tech Stack
| Layer | Technologies |
|---|---|
| Backend | Flask, SQLAlchemy, Flask-Login, Gunicorn |
| Frontend | Plotly Dash, Dash Bootstrap Components |
| Database | PostgreSQL (production) · SQLite (development) |
| API | Massive.com |
| Deployment | Render, Docker Compose |
🏗️ Architecture
┌──────────────┐      ┌──────────────┐      ┌──────────────┐
│   Browser    │◄────►│  Flask App   │◄────►│  PostgreSQL  │
│              │      │  + Dash UI   │      │              │
└──────────────┘      └──────┬───────┘      └──────────────┘
                             │
                             ▼
                      ┌──────────────┐
                      │Massive.com   │
                      │ REST API     │
                      └──────────────┘
Design decisions
- Flask application factory + blueprints for modularity — routes, services, and models stay decoupled and independently testable.
- Dash embedded at
/dash/for interactive charts without a separate JS build step or frontend toolchain to maintain. - Alembic migrations for schema versioning, so database changes are reproducible across SQLite (dev) and PostgreSQL (prod).
Project layout
StockWatch/
├── app/
│   ├── blueprints/      # auth · main · stock · user route handlers
│   ├── services/        # stock_services · user_services (business logic)
│   ├── utils/           # cache_manager · cache_monitor
│   ├── models.py        # User, Watchlist, Stock ORM models
│   ├── extensions.py    # db, migrate, login, cache instances
│   └── templates/       # Jinja2 HTML templates
├── frontend/
│   └── dashboard.py     # Plotly Dash interactive dashboard
├── migrations/          # Alembic database migrations
├── tests/               # pytest test suite
├── config.py            # App configuration
├── wsgi.py              # WSGI entry point
├── docker-compose.yml   # Local PostgreSQL via Docker
├── Pipfile              # Pipenv dependencies
└── requirements.txt     # pip dependencies
🚀 Getting Started
The quickest way to run StockWatch locally is with SQLite — no database server, no Docker, no ports to configure. You only need Python and a free API key. (Want production parity with PostgreSQL? See Run against PostgreSQL below.)
Prerequisites
- Python 3.11+
- Pipenv —
pip install pipenv - A free Massive.com API key
1. Clone and install
git clone https://github.com/epeltz33/StockWatch.git
cd StockWatch
pipenv install
2. Configure environment variables
Create a .env file in the project root. For the SQLite quickstart, leave DATABASE_URL out — the app falls back to a local SQLite file (app.db):
SECRET_KEY=any-random-string
POLYGON_API_KEY=your_massive_api_key
3. Create the database schema
pipenv run flask db upgrade
This creates app.db with all tables. FLASK_APP is already set in .flaskenv, so no extra flags are needed.
4. (Optional) Seed the demo account
pipenv run flask seed-demo-user
Creates the demo account (demo@stockwatch.dev / Demo123!) with a pre-populated watchlist, so you can log in and see data right away.
5. Run the app
pipenv run flask run --port 8080
The app is available at http://localhost:8080.
For a production-style server, use Gunicorn:
pipenv run gunicorn wsgi:app --bind 0.0.0.0:8080
🐘 Run against PostgreSQL (optional)
For parity with production, run PostgreSQL locally with the bundled Docker setup. The container is published on host port 15433 (mapped to its internal 5432) so it won’t clash with an existing Postgres:
docker compose up -d    # start
docker compose down     # stop
Point DATABASE_URL at it in your .env and re-run migrations:
SECRET_KEY=any-random-string
POLYGON_API_KEY=your_massive_api_key
DATABASE_URL=postgresql://stockwatch_user:stockwatch_password@localhost:15433/stockwatch
pipenv run flask db upgrade
pipenv run flask run --port 8080
Default Docker connection details (local development only)
| Variable | Value | |---|---| | **Host port** | `15433` (mapped to the container's internal `5432`) | | `POSTGRES_DB` | `stockwatch` | | `POSTGRES_USER` | `stockwatch_user` | | `POSTGRES_PASSWORD` | `stockwatch_password` |🌐 Deployment
Render (recommended)
StockWatch ships with a render.yaml blueprint for one-click deployment.
- Push to GitHub — Render deploys from Git.
- Create a Render account at render.com and connect GitHub.
- Create a Blueprint — go to Dashboard → New → Blueprint and select the
StockWatchrepo. Render detectsrender.yamland provisions:- A PostgreSQL database (
stockwatch-db, ~$7/mo) - A web service (
stockwatch, free tier with cold starts)
- A PostgreSQL database (
- Set secrets — when prompted, set
POLYGON_API_KEYto your Massive.com key.SECRET_KEYandDATABASE_URLare generated automatically. - Seed the demo account — after the first deploy, open the Render Shell for the web service and run
flask seed-demo-user. - Verify:
https://your-app.onrender.com/health→{"status": "healthy"}- Log in with
demo@stockwatch.dev/Demo123! - Search a ticker and confirm chart data loads
Note: Migrations run in the start command, not the build command — Render’s internal database hostname is only reachable at runtime.
DigitalOcean App Platform (alternative)
Use app.yaml instead:
- Add a Managed PostgreSQL database in the DO dashboard.
- Set
DATABASE_URL,SECRET_KEY, andPOLYGON_API_KEYas encrypted env vars. - Connect the GitHub repo — migrations run automatically on build.
🧪 Running Tests
pipenv run pytest
📄 License
Released under the MIT License.
📬 Contact
Questions or feedback? Reach out at erpeltz@gmail.com.